The inspiration of making a pocket thumb-held painting box was drawn from several old and new designs of the same. I want to paint outdoors (called En plein air painting today), learn from nature itself without the hassles of taking too much space, immobility, lethargy, handling too many materials and drawing too much attention. This little box will give me the opportunity to train myself from nature as well as provide sketches for the future paintings. I can literally paint anywhere now. 😁
I want to thank artists Stefan Baumann wholeheartedly for his positive endorsement of Utrecht thumb box to avoid all the problems mentioned above. He presented his thoughts in these two lectures on his YouTube channel:
https://www.youtube.com/watch?v=QUCxhkKnqZU
https://www.youtube.com/watch?v=8hmw0_hOVIo


There are many other designs present that were produced by makers and artists (DIY) over the years. You can have a glimpse of such boxes below:


Here is my mini outdoor sketching box. Total cost Rs.300 ($4.5/-) instead of Utrecht's Rs.6000/-box with US to India shipping. I bought the box, a saw (much later) and wood glue. I prepared this without any carpenter's tools apart from just wood glue, scissors, pockets knife and my arm strength. It looks flimsy but both the box and its cardboard separations inside are very hard and strong.

Back rest for the lid. This was pasted to avoid any drilling for hinges as I don't have any carpenter's tools.

Inside, there is room for two cardboard panels. These also help me to hold the panels and brushes in place when I am painting. The panel-mount below the lid is just wood and panel-rest above is an 'L' shaped hard cardboard supported by pasted wood inside (not seen here).
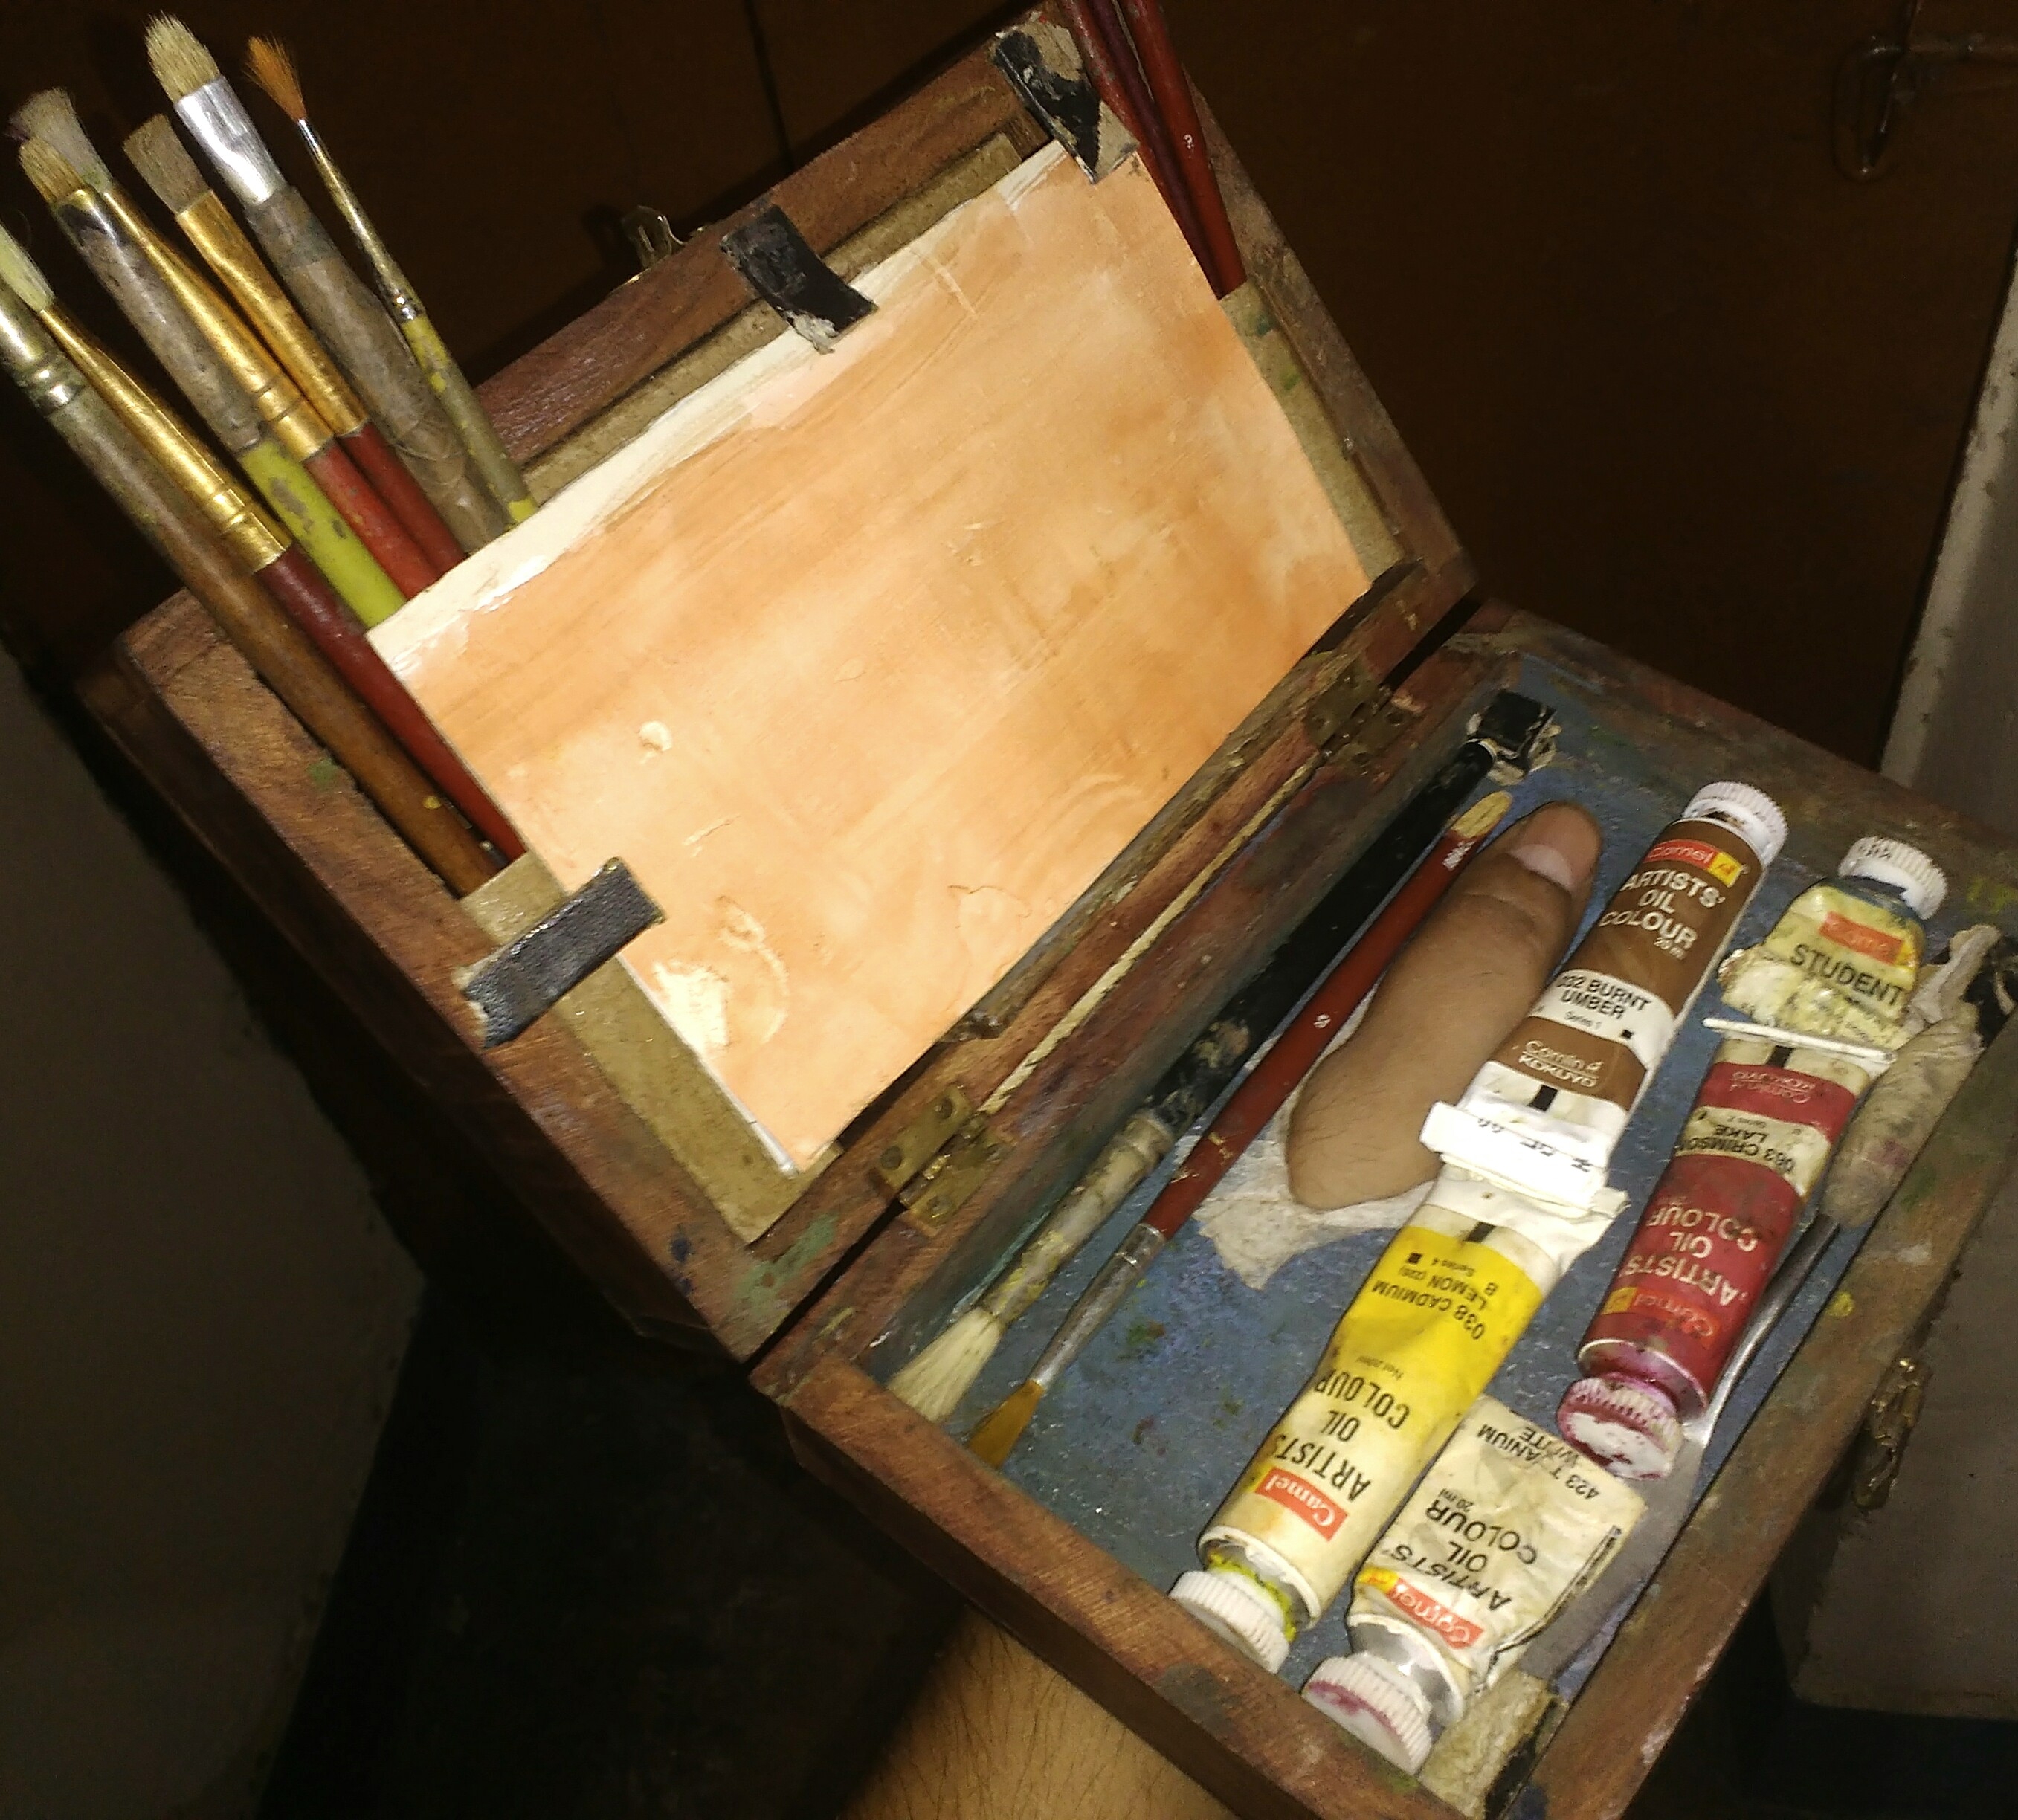
Opened the box. I added a 9ml tube for scale but I can also carry 20 ml tubes, rags and this box in a side bag.
I will paint on oil paper mounted on cardboard for most of the time as they will mostly be sketches. It is better to paint without mediums on paper as the paint moves freely. But I can carry a small plastic homeopathic drop bottle with tups+linseed oil mixture if I am using small canvas panels. Notice how the palette was placed inside the pochade box when it was closed. I can use very small market available canvas panels; make your own panels by using gessoed ply/Masonite or pasting canvas on ply/Masonite.

I put the palette below to show how it works. It is a grey colored plastic sheet pasted on top of a very hard cardboard. I can rest two panels inside very comfortably.

Brushes were cut to fit the size of the box. I am carrying a lot of old brushes so that I can maintain the purity of tone.These are mostly smaller nylon ones - slightly harder than watercolor ones and a few old bristle brushes. Bigger ones are for quick blocking in and smaller ones are for modelling. There are also two detail brushes. See what I did to the palette knife. I removed the holder and pasted medical gum strips over the steel neck to gain some grip.

A test painting took me 15 minutes. I was planning to make this scene into a big painting for sometime. So this sketch will be very useful.
Brushes are rested tightly behind the panel. They are practically immovable. Palette is immovable due to proper placements of bigger bristle brushes below that are generally not used for such a small scale painting. I pasted two hard black cardboard pieces to hold the panels in place. I can modify this in future though but here I deliberately eliminated the uncomfortable position of holding the box and the brushes by the left hand thumb.

Removed the oil paper from the cardboard panel with a pen knife; glue stick on the side.

The colors that I can carry are my leftover paints: Titanium White, Cadmium Yellow Lemon (Cadmium Yellow Pale/light can also be used), Crimson Lake (Alizarine Crimson in the studio), French Ultramarine/Cobalt Blue and Burnt Umber/Burnt Sienna. This is my usual palette - two sets of warm/cool dark and light colors and one red. I also have a few additional colors for convenience. These are Prussian Blue, Cadmium Red Light, Viridian and Sap Green. These colors appear once in a while in the natural world but just in case...
I painted my first true plein air paintings on Sunday, 21st of May, 2017. A few difficulties arisen during the painting process.
This box works like a dream. 😎 Here are two of my very first outdoor sketches. Still a long way to go by the way! Outdoor painting is truly very tough due to changing conditions.


Update on 28th of May 2017:
I made a few small changes into the design. Position of the panel holders were changed so that the panels would not wobble at all. I also added five 20 ml tubes of color in the box itself so that the box becomes compact but smaller 9 ml tubes would be ideal. A few more rags were placed under the palette for wiping the brushes. The bigger brushes shown above were moved to the utility side bag along with additional colors, small medium squeeze bottle.

Update on 29th of May:
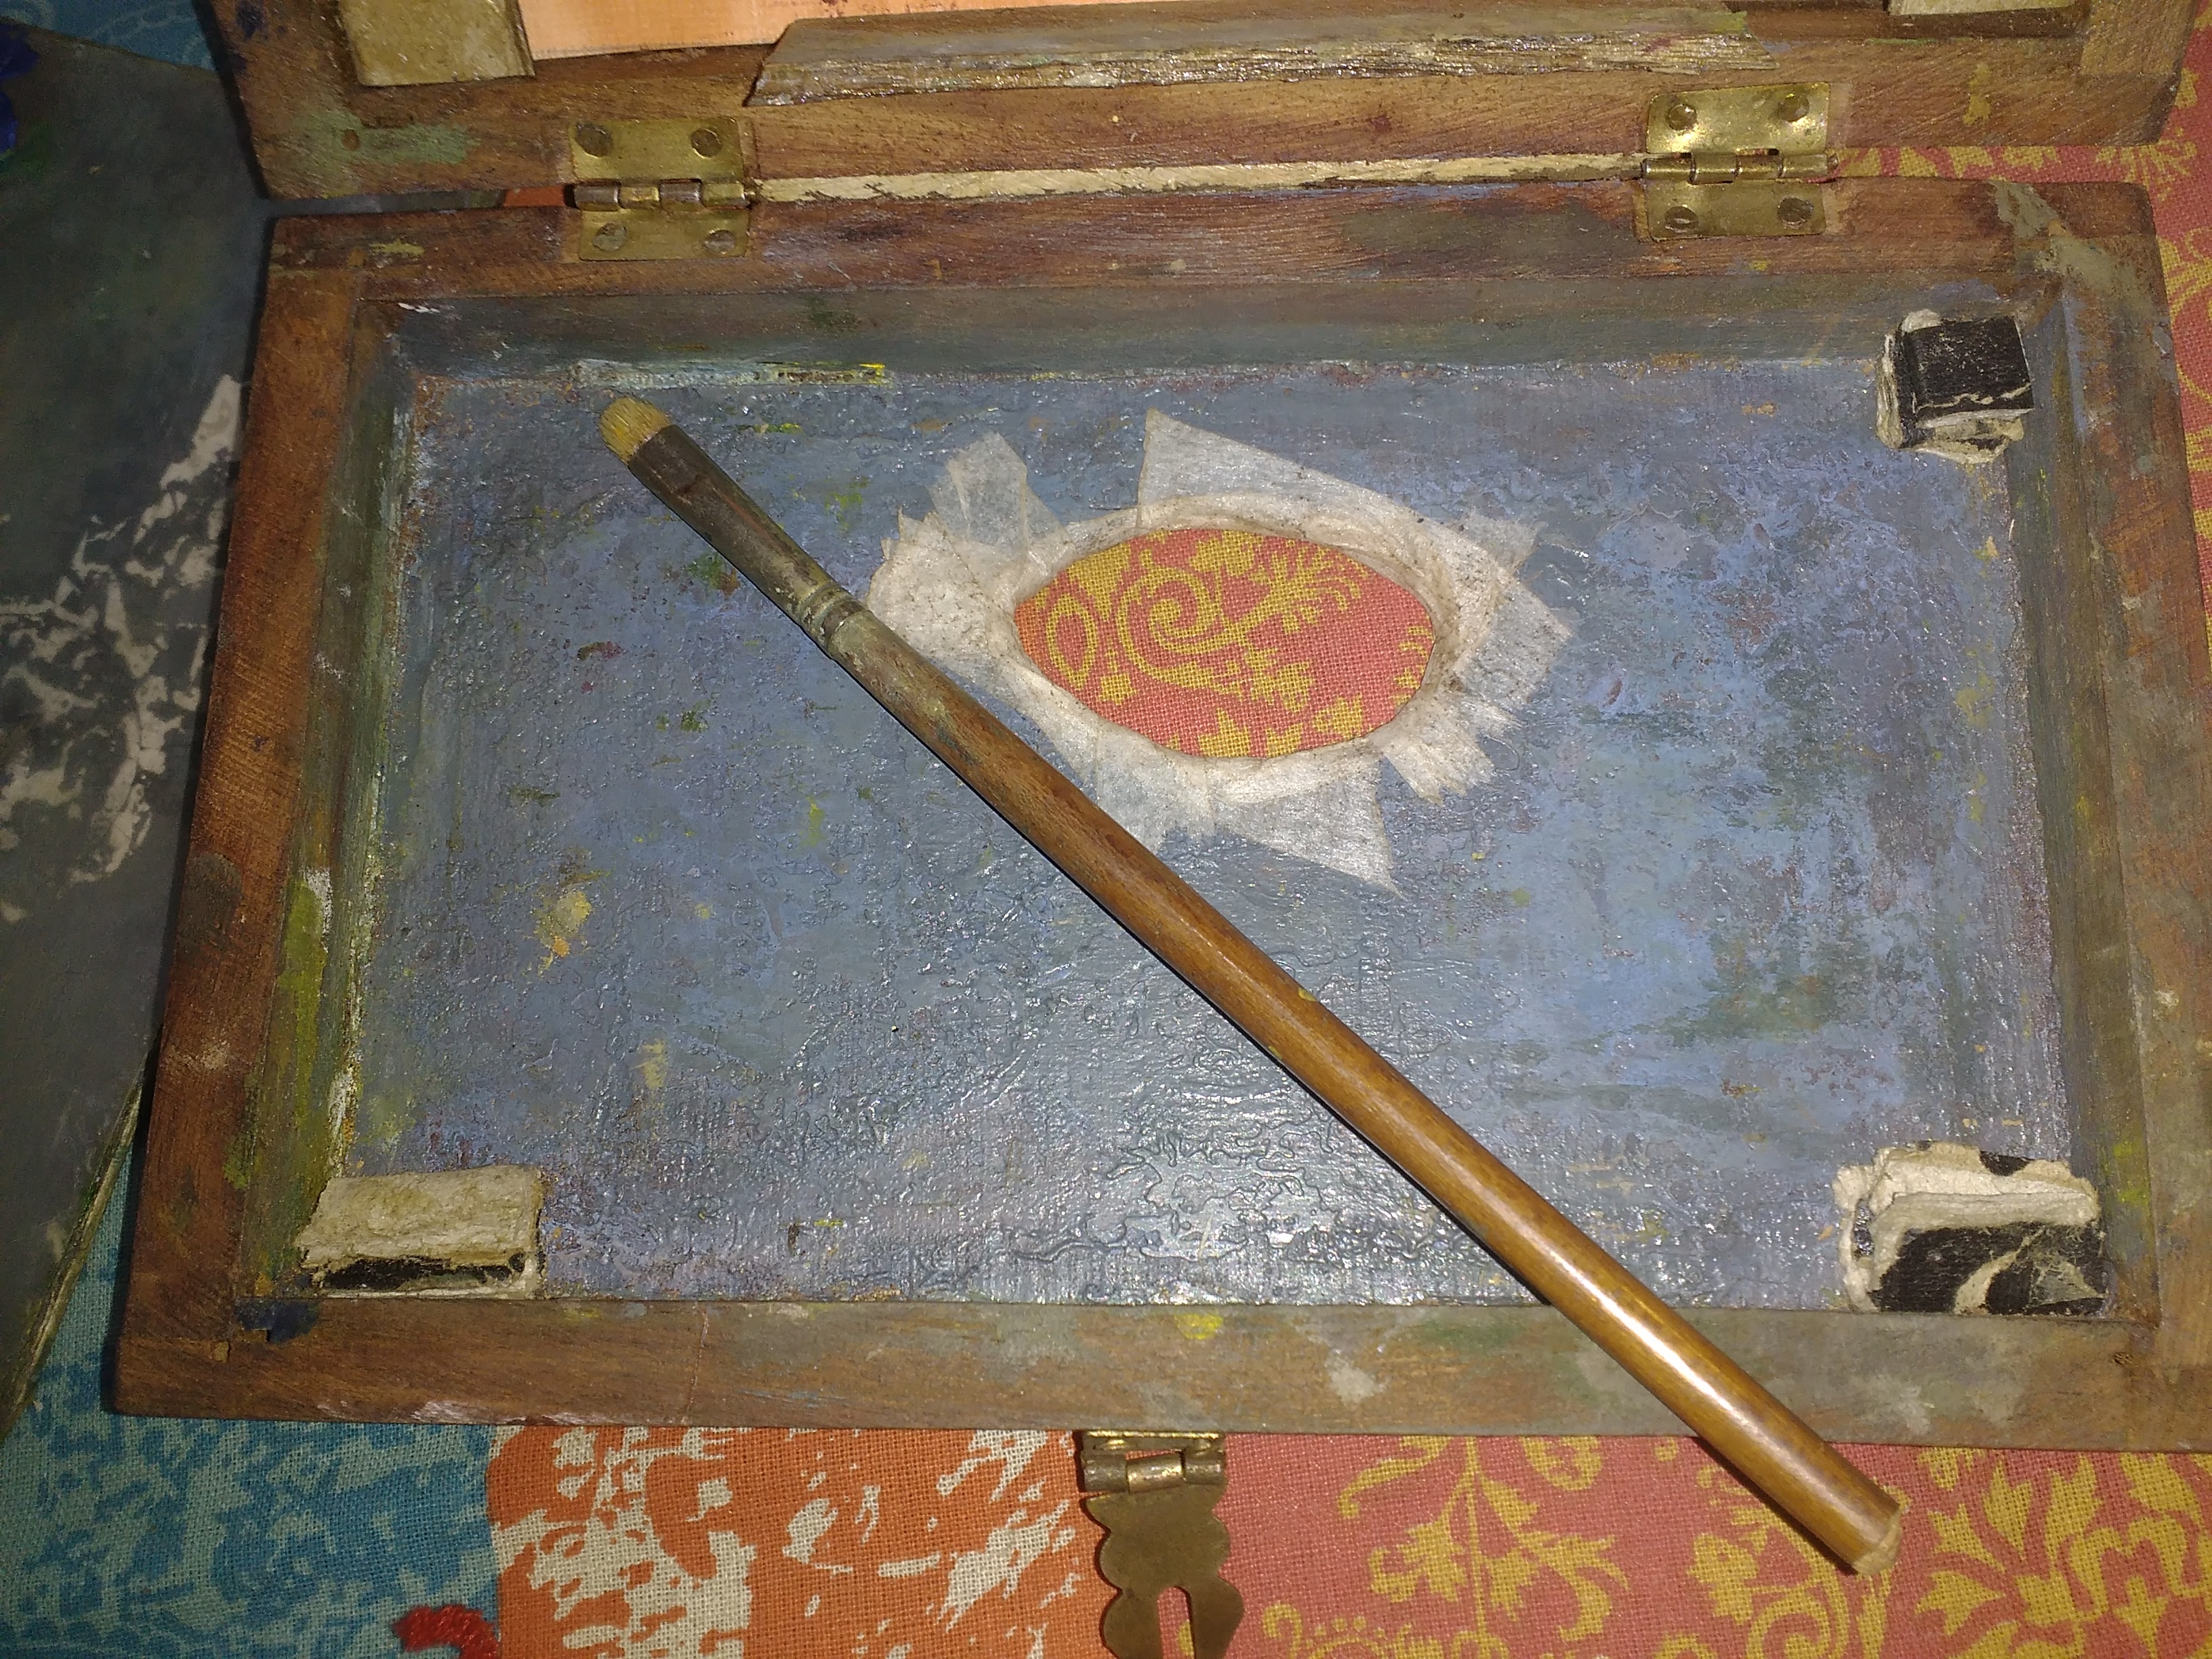
The final neccassary changes are now made. Now it is actually a thumb box. I drilled a thumb hole with a new hacksaw, sanded the edges and pasted some tapes to protect the thumb from hard uneven edges of the wood. I can do huge change now. One thing comes to my mind is to convert the top lid into a genuin panel holder.


https://www.youtube.com/watch?v=QUCxhkKnqZU
https://www.youtube.com/watch?v=8hmw0_hOVIo


There are many other designs present that were produced by makers and artists (DIY) over the years. You can have a glimpse of such boxes below:
Here is my mini outdoor sketching box. Total cost Rs.300 ($4.5/-) instead of Utrecht's Rs.6000/-box with US to India shipping. I bought the box, a saw (much later) and wood glue. I prepared this without any carpenter's tools apart from just wood glue, scissors, pockets knife and my arm strength. It looks flimsy but both the box and its cardboard separations inside are very hard and strong.

Back rest for the lid. This was pasted to avoid any drilling for hinges as I don't have any carpenter's tools.

Inside, there is room for two cardboard panels. These also help me to hold the panels and brushes in place when I am painting. The panel-mount below the lid is just wood and panel-rest above is an 'L' shaped hard cardboard supported by pasted wood inside (not seen here).
Opened the box. I added a 9ml tube for scale but I can also carry 20 ml tubes, rags and this box in a side bag.
I will paint on oil paper mounted on cardboard for most of the time as they will mostly be sketches. It is better to paint without mediums on paper as the paint moves freely. But I can carry a small plastic homeopathic drop bottle with tups+linseed oil mixture if I am using small canvas panels. Notice how the palette was placed inside the pochade box when it was closed. I can use very small market available canvas panels; make your own panels by using gessoed ply/Masonite or pasting canvas on ply/Masonite.

I put the palette below to show how it works. It is a grey colored plastic sheet pasted on top of a very hard cardboard. I can rest two panels inside very comfortably.

Brushes were cut to fit the size of the box. I am carrying a lot of old brushes so that I can maintain the purity of tone.These are mostly smaller nylon ones - slightly harder than watercolor ones and a few old bristle brushes. Bigger ones are for quick blocking in and smaller ones are for modelling. There are also two detail brushes. See what I did to the palette knife. I removed the holder and pasted medical gum strips over the steel neck to gain some grip.

A test painting took me 15 minutes. I was planning to make this scene into a big painting for sometime. So this sketch will be very useful.
Brushes are rested tightly behind the panel. They are practically immovable. Palette is immovable due to proper placements of bigger bristle brushes below that are generally not used for such a small scale painting. I pasted two hard black cardboard pieces to hold the panels in place. I can modify this in future though but here I deliberately eliminated the uncomfortable position of holding the box and the brushes by the left hand thumb.

Removed the oil paper from the cardboard panel with a pen knife; glue stick on the side.

The colors that I can carry are my leftover paints: Titanium White, Cadmium Yellow Lemon (Cadmium Yellow Pale/light can also be used), Crimson Lake (Alizarine Crimson in the studio), French Ultramarine/Cobalt Blue and Burnt Umber/Burnt Sienna. This is my usual palette - two sets of warm/cool dark and light colors and one red. I also have a few additional colors for convenience. These are Prussian Blue, Cadmium Red Light, Viridian and Sap Green. These colors appear once in a while in the natural world but just in case...
I painted my first true plein air paintings on Sunday, 21st of May, 2017. A few difficulties arisen during the painting process.
- The palette tended to slide off towards the panel box when I held the box vertically, so I pasted small posts in the tree corners of the brush box. Now it is absolutely immovable.
- It is better to carry a small plastic cup with leads on for excess paint on the palette. Scrape the leftover paint, make a pile of a singular color and then put this into the cup. This color can also be used in the future as most of the tones in the nature are more towards grey.
- I put a cleaning rag on top of the brushes, so that I could shut the lid without cleanings my palette if there is an urgent need. This will prevent the paints to be smeared on top of my brushes.
This box works like a dream. 😎 Here are two of my very first outdoor sketches. Still a long way to go by the way! Outdoor painting is truly very tough due to changing conditions.


Update on 28th of May 2017:
I made a few small changes into the design. Position of the panel holders were changed so that the panels would not wobble at all. I also added five 20 ml tubes of color in the box itself so that the box becomes compact but smaller 9 ml tubes would be ideal. A few more rags were placed under the palette for wiping the brushes. The bigger brushes shown above were moved to the utility side bag along with additional colors, small medium squeeze bottle.

Update on 29th of May:
The final neccassary changes are now made. Now it is actually a thumb box. I drilled a thumb hole with a new hacksaw, sanded the edges and pasted some tapes to protect the thumb from hard uneven edges of the wood. I can do huge change now. One thing comes to my mind is to convert the top lid into a genuin panel holder.


No comments:
Post a Comment